

 |
| You can see how the sides of cardstock base doesn't extend to the top. I added length to the insert to add durability to the box. The cut-out design gave it a more snug fit inside and worked like a charm. |
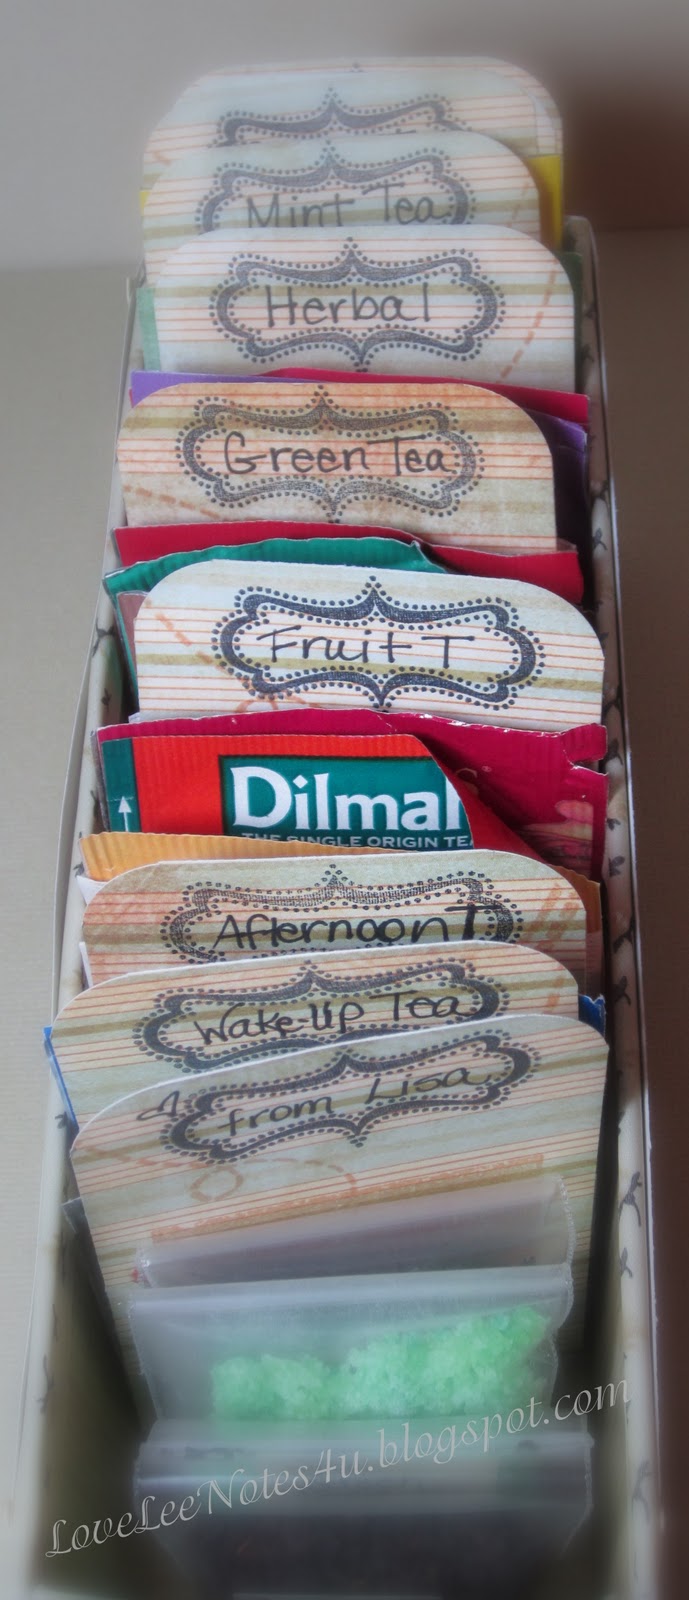
I decorated the outside of the box with fencing I die cut with my Cricut, using my Gypsy to weld them together, from the Heritage cartridge -- I used off white cardstock and inked over it with distress ink: Antique Linen. I also used Tim Holtz Tattered Florals die to make the flower on the front end. This was an extra one I made when I demonstrated paper sueding in an earlier post--it's attached to chipboard for a more dimensional floral effect. Tea bag divider tags were cut 2 3/8" x 3 3/4" from coordinating cardstock--I stamped varied designs on each one and added clear embossing to each tag for special effects, though I don't know if you can really tell from the photos. I labeled each of the divider tags with different types of teas, and of course added some tea bags so you could get the idea. I left a couple blank dividers in case another label was thought of. I used CTMH stamp sets: Cup of Friendship, Annotations, Make it Count, Come Unto Me, and He is Risen for the various designs on the Tea dividers.

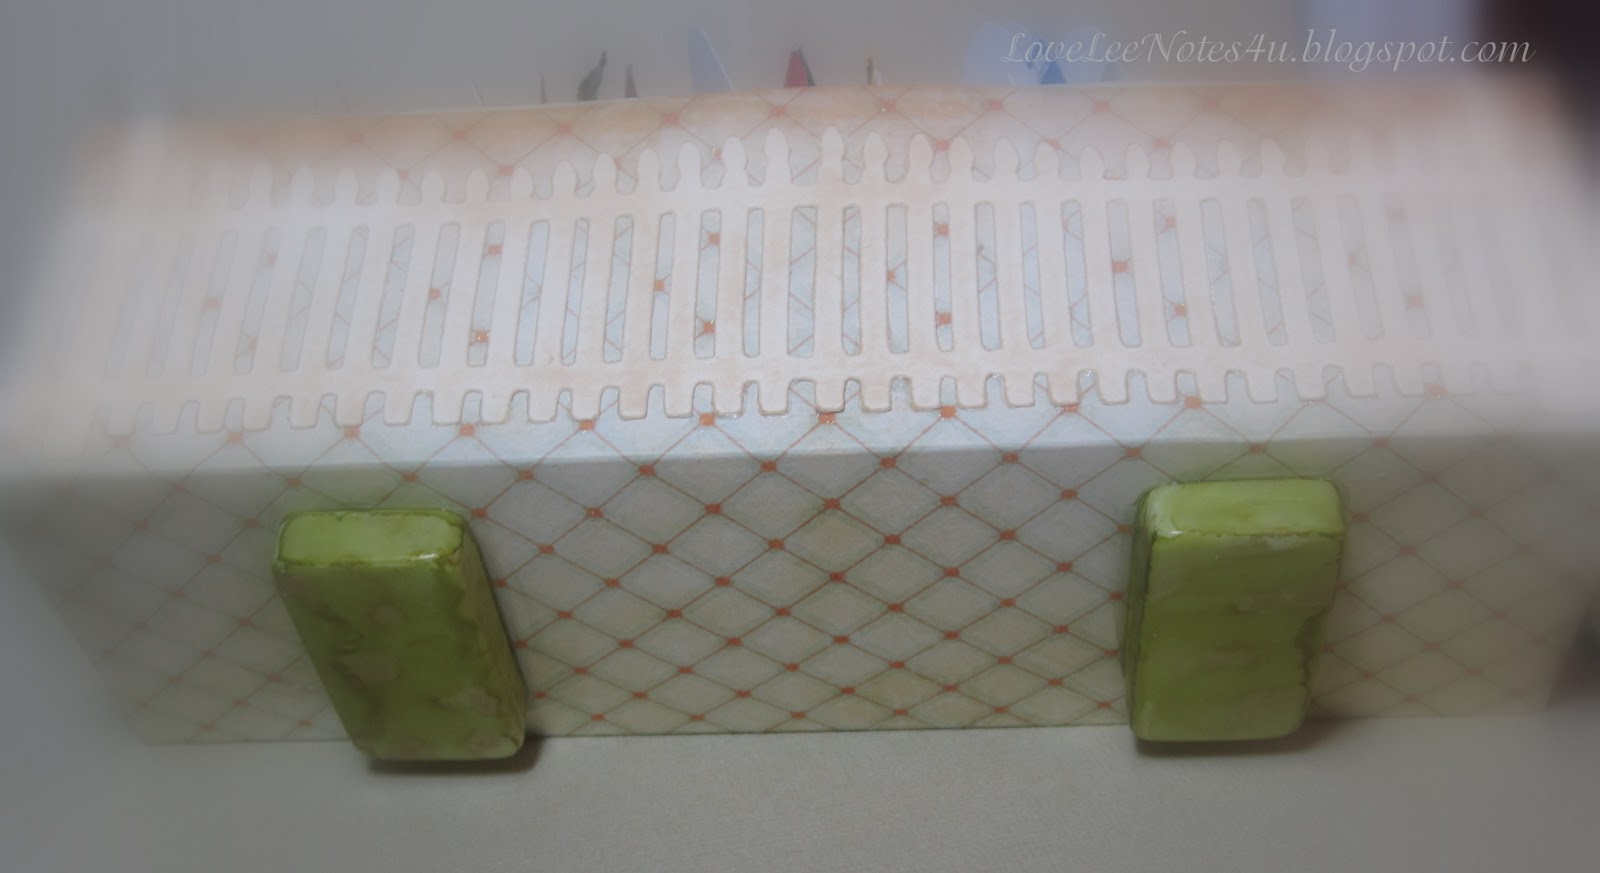 In case the Tea Box is left on the counter, I didn't want the bottom of the box to become wet and distorted. So I used two dominoes for the "feet" (found a box of dominoes at the thrift store for 50 cents), and applied alcohol ink to them with a felt applicator (see this POST where I used alcohol inks, for more info). I used: Adirondack Lettuce, & Gold mixative alcohol inks. I adhered them to the bottom of the box with The Ultimate glue by Crafter's Pick. I love, love, love this glue! I works so well on sooo many things--holds really well, dries clear, water resistant, and child safe non-toxic.
 I originally made a box top for it, but in the end I liked it so much better without.

I think this would be nice to pull out when company comes so they could browse through the tea they'd like to try. In my case, I have tea in so many tins, boxes & tea chests that I'm thinking I could put quite a variety in this box and pick a tea according to my mood, or the time of day, without going on a search.
Other ideas: if you didn't want to use this box for your tea, you could use it to organize your ATCs (Artist Trading Cards), since it's the perfect size. Or what about all those school sized wallet photos--I get so many of those during the school year & at Christmas time, and again...the perfect size to organize by friends, family, and so on. It would look great sitting on a coffee table too. Those are only a few ideas of how you could use this box...what will you come up with?!
Thanks for popping in. Happy Crafting...Lisa


This idea is absolutely gorgeous! I'm definitely going to be making a few of these!
ReplyDeleteI hope it's alright with you that I've linked this page to my wedding blog :)
http://noimpactbride.blogspot.com/
Thank you!