Tuesday, December 20, 2011

Christmas Heaven

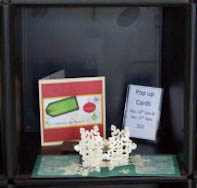
When I make 6" x 6" cards I usually hand deliver them, as there is usually an extra postage charge for the larger cards.  For this card, I wanted to play around with a gate fold card using the larger Sizzix Snowflake 3D die cuts as the "gate" closure.  This particular Snowflake 3D die is actually made for Pop-up cards, but the large snowflakes can certainly be used in a variety of other ways too.  (I apologize I don't have a better photo of the pop-up version).

Pop-up version

For this gate-fold card I used cardstock from Bo Bunny's 'Tis the Season' and embellished with a variety of stamps including:  CTMH 'Christmas Heaven', Tim Holtz 'Winter Sketchbook' & 'Holiday Wishes', and Inkadinkado's 'Warm Holiday Wishes'.  I cut the "winter wind" from Sizzix swirls die, and added a couple stickers to the front.  I did color in the snowman face with Copic markers, but the red berries aren't showing up as red in the photo for some reason. 

Another quick card worked out quite well...I'm getting down to the wire and still have a few more to go.  Hope you're having a beautiful week!
Lisa

Monday, December 19, 2011

Winter Anniversary

My sister-in-law & her hubby just had their "winter" Anniversary.  I figured she is seeing lots of cards with winter themes for her Christmas cards, so I kept this more neutral.  The card base was a leather look cardstock I acquired somewhere years ago, and haven't been able to find since--so I use it more sparingly these days.  For the mat I used DCWV Mariposa cardstock, with the green swirls being similar to her wedding colors.  Then I simply used Susan Branch stickers to decorate the front of the card.  A punch was used for the shimmer pink heart -- just for a pop of color, and I added their initials with a black sharpie.  The finishing touch was a shimmery, tan grosgrain ribbon. 

Happy Anniversary, Stephanie! 

Sunday, December 18, 2011

Just Chillin

Another quick card -- using the winter text Cuttlebug embossing folder, I embossed the card base.  I used an 05 black Zig pen to sketch a box around the snowman and some of the words, then swiped Tumbled Glass distress ink over the entire card front to highlight the text boxes that were raised, due to the embossing.   With markers I colored in the snowman's nose, arms, & face.  I added an acetate "Merry Christmas" with a snowflake brad, and added some vellum snowflakes, and blinged snowflakes with foam dots.  And finished with the "Let it Snow" ribbon. 

This was one of my husband's favorites.  I think it turned out "cool".  =)
Lisa

Saturday, December 17, 2011

Merry Christmas Just Rite

This card was made using the Just Rite Stamp set "Something Sweet", and the 25pt Times New Roman Font set.  For the scalloped circles I used Spellbinders scalloped circles.  I simply embossed the white cardstock card base with a snowflake Cuttlebug embossing folder and inked it with Tumbled Glass distress ink.  I stamped my sentiment and embossed over it with Tim Holtz' Snowman embossing folder.  I added a bit of white pigment ink to the snowman and adhered it to the card.  I finished it off with a green ribbon. 

There is a variety of colors on this card, but I like how the scallops made them look somewhat like a wreath -- though I kinda wish I'd moved the ribbon upwards a bit more.  All-in-all, this card came together quickly once I had the stamp font adjusted how I wanted it.  =)

Hope you're having a stress-free day!  Lisa

Friday, December 16, 2011

O Holy Night


I recently picked up this stamp, "O Holy Night" by Inkadinkado, for 99cents -- and I just love it.  I paired it with the angel stamp from Tim Holtz' Joyful Song collection and was pleased with the outcome. 

I used a soft white cardstock for my base, and cut out a matching mat -- corner rounded all the edges.  I stamped O Holy Night with Archival black ink directly onto the mat, and used Stormy Sky Distress Ink to blend into the background.  I stamped one angel in black Archival ink, and the other in the new seasonal Distress ink, Iced Spruce.  For both angels, I mixed a bit of Sunflower Sparkle perfect pearls with water and painted them (if you click on the picture to enlarge it, you'll see the Perfect Pearls a lot better).  Once dry, I cut the angels out and used mounting foam (pop dots) to adhere them to the cards.

I used Copic markers to color the O Holy Night stamp (with the Iced Spruce angel), and I painted with Distress inks for the other card.  I added a touch of gold Spica pens for the stars and for the card that shows a misting of gold stars raining down, I used the perfect pearls again.  The inside sentiments read, "Come Let Us Adore Him".

I think my favorite is the card in which I used the Archival ink on the angel.  Which is your favorite?
Lisa

Tuesday, December 13, 2011

Quick Candy & Cocoa Goodies

If you're looking for a Super Quick, Easy, AND Inexpensive crafty gift for a lot of people, or even a few, this is the project for you!

Bo Bunny winter deco cardstock was used for these

1.  Cut 12"x12" decorative cardstock (CS) into either (3) 4" x 12" lengths, or (4) 3" x 12" lengths, depending on how many Cocoa holders you're needing.   

2.  With CS strips horizontal, score at 3 7/8" and 8".

3.  Fold into thirds:  fold 8" score line towards the left, then overlap by folding 3 7/8" score line towards the right side.

4.  Bring top right corner down to bring top edge flush with bottom edge, and crease to form a triangle. 

5.  On triangle fold only, attach one staple to left bottom corner and one staple to bottom right corner.

6.  Insert Candy Cane into front section of triangle fold, and Hot Cocoa packet into back pocket.  In the back portion of the triangle fold you can add a small card, or tag.

NOTE:  Using deco cardstock helps keep this project simple and fast, without the need for additional embellishments.  With a little extra time you could add more decorative elements. 

Additional ideas: 
- Punch holes in the sides and add a ribbon handle
- Add a gift card in with the tag if you're needing a bit of something extra
- Tie a ribbon around the Goody Pouch, adding a plastic spoon to the ribbon before tying in a bow.
- Make project as instructed, but add a second pocket over-top of the cocoa pouch to hide it away.  Wrap with ribbon to secure.
- Complete these gifts by adding to the Tag, or Card, the "Legend of the Candy Cane":

Legend of the Candy Cane

Look at the Candy Cane
---what do you see?
Stripes that are red
like the blood shed for me.
White is for my Savior
who's sinless and pure!
"J" is for Jesus, my Lord,
that's for sure!
Turn it around and a staff
you will see---
Jesus, my shepherd,
was born for me!
---Author Unknown

Merry Christmas crafting!  Lisa

Monday, December 12, 2011

Book Purses: Repurposing Two Gifts from One

Has it been three weeks since I've blogged?!  Wow...time really does fly.  Since then I've had to buy a new-to-me vehicle (long story), had my Mom & G'ma come for a visit, my older son Nathan came for a quick Christmas visit, and been busy with both working, shopping, & creating -- not to mention all that accompanies the season.  Have you been feeling that busy too? 


Today I'm going to share with you a project that will take about three hours to complete...give or take:  Book Purses.  I've had several requests for this tutorial from those seeing these on my slideshow (on my sidebar), and I'm finally finished preparing it.  I've found blogging to be totally different than teaching a class -- in class I can "show & explain" what I'm speaking of much easier, while blogging is mostly still pictures and harder to articulate.  Though my YouTube channel is hopefully going to be more available after the New Year, and that should help.

As for these "purses" -- they make great gifts, and can be relatively inexpensive.  Look for used books at thrift stores/yard sales -- and if they have a dust jacket, even better.  Some pictures below are not a great quality, as most of these were taken through the years just before I gave them away -- but I suppose you'll get the idea.  The basics on creating the book purse are written below, but the options for creating them are endless.  Note that Step 2 is optional for preserving the book...which also makes this project two gifts in one, in that you can give both the book & the purse as a gift!  If you don't think they would use the finished project as a purse, you could make it into an organizer, an address book keeper, or how about adding an organizer inside that lists all the books they currently own, have read, etc.  Lots of possibilities...but this is a long post so I better get started. 

NOTE:  To keep this post from being too long, the pictures I've included are sized small.  To see them larger - right click on the picture, then click to open in another tab/window.
 
Supply List:
Hardback Book – attention to the spine of the book that it is in good condition
½ yd Fabric – for inside lining of purse and gusset, based on purse size
Coordinating Thread – to match your purse fabric
Button w/shank – decorative to coordinate with your purse, for fastener.
Purse Handles – this could be store bought handles, or you can purchase the items to bead your own handles, or use ribbon to make your own...so many options.
1 yd Fringe/Lace/Ribbon – decorative fibers are a great way to dress up your purse, the amount you need is based on your book size, and usage.  A yard is usually sufficient.
1 1/4 yd Ribbon – for closure loop and purse handle attachments. 
Decorative Elements – anything you’d like to add cosmetically to your purse to enhance its look.
Gel Medium – a good adhesive & finisher that dries clears but is also water resistant.  Mod Podge is the product I use most often and readily available.
Foam Brush – for applying gel medium
Hot Glue Gun/Glue Sticks – Hot Glue is a fast and easy fixative that helps with the bonding & durability of your purse.
Ruler or Measuring Tape – for accurate measuring of your project
Craft Knife – sharp instrument needed for cutting spine of book away cleanly.  A box cutter is an alternative tool you can use.

Steps to creating a unique purse from a hardback book
1.      Remove binding from book
      a.     Keep flyleaf (very 1st & last page) intact, gently remove (peel away) page attached to flyleaf.
      b.     Carefully use craft knife to cut between flyleaf & next page, towards spine, to release book from binding.  Multiple short, light strokes will prevent you from cutting into the spine of your book.  Take your time.
      c.     Cut away all but about an inch of your front page flyleaf to reinforce spine, but leave enough of back page flyleaf to cover spine.  Adhere remaining flyleaf with gel medium into book spine.


2.      Optional step:  Create book cover, to preserve book for reading
       a.     Use dusk cover that came with book, adhere inside spine of cover to spine of book with hot glue gun.
       b.     Use brown paper bags, wrapping paper, cardstock, or fabric wrapped around 3 pieces of chipboard (spine, two side panels -sized to fit book).  Adhere spine of cover to spine of book with hot glue gun.
      c.     Create your own designed cover - I found this site, Book Cover Creator, that might give you some ideas but I personally haven't tried it yet.  If you're well versed in Photoshop you might like this YouTube Video, or for a more pricey solution check out Book Cover Pro.

3.      Loop 2 - 8" lengths of flat ribbon (for each handle) through metal clips of purse handle & hot glue together.  Secure handles into each side of book by attaching ribbon to book with hot glue gun.  Be sure to allow free movement of handles by watching how far into book you glue the ribbon.  Make sure purse handle is centered on 1st side before attaching.  When attaching handle to the second side, use the purse handle already attached as a guide.  If you're using ribbon for your handles, attach 3"-4" into purse sides, making sure to match both sides of purse for ribbon handles.
  Note:  I learned from some earlier versions of the purses I made to attach the handles before adding the fabric, so the ribbon for the handles could be hidden under the fabric inside - gives it a more clean, complete look.

4.   Fabric Lining - lay book flat and measure fabric to fit the inside of the open book - cover to cover including spine.  Add about ½” to 1” (for hem) to all four sides of fabric when you cut to fit. 
      b.   Turn hem under and press well with iron -- no sewing required.
       c.     Using foam brush, apply gel medium to inside of book attaching wrong side of fabric to the gel medium by smoothing fabric to glue & firmly pressing into book.  Make sure hem is turned under when adhering to book.  NOTE:  the reason I prefer not to sew the hem in place is in case I've mis-judged the size of the fabric to fit the book -- that way I can use some of the extra "hem" if I'm short, or turn under a bit more if needed.

5.      Determine size of gusset (for sides of purse)
      a.    With book opened up to the width you want the purse opening to be, position bottom of book on cardstock.  Using book as a guide, draw the shape of the inside of the book onto the cardstock -- including spine & both sides.  Then remove book and connect to the two side lines to form a pattern for the gusset.
       b. Add ¼” around sides and bottom of pattern. 

6.      Prepare Side Gusset Panels
      a.     Use gusset pattern to cut out fabric – fold fabric and place top of pattern (longest horizontal line) on folded edge, and cut out.  This will create one gusseted side of your purse.  Repeat, for side two.
      b.     Turn inside out and sew simple stitch down both sides of gusset panel (This is the reason we added ¼” to our pattern).  Turn right side out and sew along bottom with 1/4" hem exposed -- this part will be hidden when we attach it to purse.  Do this to both panels.
      c.     When both panels have been sewn, iron flat.
      d.     To create gusset for each side, fold sewn fabric in half with slanted sides together.  Sew as close as possible to folded edge, top to bottom.  This creates the gusset that allows the purse to open & close properly.

7.      Attach Gusset
one of my student's book purse
showing gusset, & velvet lining
       a.     Hot glue one side of gusset panel to one side of book (book cover front, inside edge, and repeat on opposite side.  NOTE:  center of gusset, where it is sewn down the middle should be on the inside of the purse (sewn seam inside purse on both sides).
       b.     Now attach second side of gusset to back side of book, inside edge, with hot glue.  Book will now be folded to resemble your purse. 
       c.     Finally, attach bottom of gussets in the same fashion (hot glue), but use the ¼” sewn flap to glue in place, flap facing inwards to purse.

8.      Adhere a button with shank to front of purse, where you’d like to fasten your closure.  Build a mound of hot glue prior to attaching button.  Tack button carefully in place and hold until glue is cooled.  Add more hot glue around base of button as needed. 
  NOTE:  For my purse I painted on gold perfect pearls to the hot glue as it cooled around the button shank, as I preferred not to see the color of the glue on the closure (though it's barely visible to most people).

9.      Attach ribbon closure to back of purse.  Measure the loop of ribbon closure around button fastener to know where to affix to back of purse.  Tie ribbon ends, or cording, into a decorative knot and trim ends.  Adhere knot to back of purse with hot glue (use a decorative element to disguise ribbon knot, if desired). 

10. Decorate front/back of purse with ribbon or any other decorative elements as desired.

11. Tada!  You’re finished…enjoy your new purse!


A variety of my earlier book purses
One of my student's book purses, made from husband's gaming book!
I had some chain length which she added to the spine for decor.
Thanks for hanging in there while I've been away.  Hope to see ya again soon.  Lisa