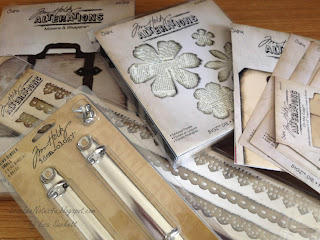
Today I'm going to show you a fast (and easy) organizer booklet I made for my
Tim Holtz Bigz & Sizzix Dies using it's own packaging! You could also use this same concept for a variety of other ideas including other organizers, books, etc.
I came up with this idea because I was keeping my large dies in their original plastic packaging, and every time I pulled the foam padded dies out of the plastic I would seem to get a static shock (it's been kinda dry here--other than today when it started
snowing). =)
So I pulled the paper packaging out of the boxes and was clipping them together, thinking about making them into a small booklet, but the sizes were all so different. As I was cutting up the plastic to repurpose for other projects...that's when the lightbulb came on! I had just picked up a set of Tim Holtz' small Ring Binders and I discovered that they fit perfectly into the side panel of the plastic packaging.
I simply took the plastic box for the largest die I had and cut around three edges -- leaving the left side intact for the ring binder. Then I put it on my paper trimmer to trim the cut sides neater. My plastic cover ends up measuring 6 1/4" high x 6" wide. I used a 1/8" corner rounder to trim off the sharp corners of the plastic.
I also cut my product sheets to 6" high x 5 1/2" wide. The larger Bigz dies needed trimmed to fit width-wise, and I folded the bottom edge behind so the front panel measured 6" x 5 1/2". The decorative strip dies were folded in half and I cut off paper that extended further.
I attached the ring binder by marking the holes first, then cut the holes using a small hole punch, and attached the ring binder with the included brads.
I used the bottom strip from the paper packaging to attach to the outside of the spine -- this helps to hold the brads in place, and adds a place for you to title your organizer, as well as a decorative element.
NOTE: before attaching the ring binder, you might want to add decorative paper to the inside of the spine as well to help hide the brads since the packaging is clear acetate.
For the tabs, (cut w/Tim Holtz' File Tabs - On The Edge die), I just used scrap paper (TH Vintage Shabby) cut 1/4" larger in length than my product pages, and labeled with my white Signo gel pen & outlined with a fine point black sharpie.
I've also posted a short YouTube video showing a bit more about this newest organizing booklet for my Sizzix Dies. You can click
HERE to view the five minute video in a different window.
Well, that's it! Think of all the possibilities... =)
Thanks for stopping by. Hope you're keeping cozy! Lisa


Girlfriend, you are just too clever!!! Great idea and thank you for taking the time to share!
ReplyDeleteGreat idea! Love the tag dividers, too.
ReplyDeleteI have used double sided tape and stuck them all to my actual dies so that I can see at a glance which is which...I don't use the shim on my Vagabond then because of the extra thickness.
ReplyDeleteThank you very much for this Ah-some Idea!
ReplyDeleteHiya Lisa - love your blog and this organiser is simply brilliant - definately going to make one
ReplyDeleteI've joined your followers - great to meet you x Hilda in the UK