Wednesday, February 29, 2012

Queen of Hearts Tag

Happy Leap Day! 
It seems I've been away a lot this month -- but after taking my son for his college visit tomorrow I think we'll be able to stay home for a while. 

For this tag I'm joining in the fun with Tim Holtz' 12 Tags of 2012 challenge!  You have a month to create some "tagspiration" and I'm cutting it REALLY close.  I guess it's good for me that I had an extra day this year. 

My inspiration for this tag, aside from it being my friend's birthday, actually came from this past year's 12 Tags of Christmas (by Tim Holtz, of course).  His tag for day 12 utilized his deco strip die "Vintage Lace" to create a faux dresden paper lace/german scrap (for more info on dresden/german scrap click HERE).  I was so excited about it that I immediately went out and bought the die.  I had recently acquired several rolls of German foils and I got straight to work cutting out the "faux dresden". 


I got a bit carried away with my cutting of the colored foil, so I adhered them to blank paper with removable adhesive down the left & right sides of the paper. I gently pull them off the paper as needed, and they store flat very easily.


Another tip Tim Holtz passed along was to take adhere a strip of packing tape to the die and run it through the cutter prior to cutting paper.  It helps all those little pieces to come out SO much easier!  What a fantastic tip!


As most of you know, I love my Perfect Pearls -- and Sunflower Sparkle is my favorite!  Using an acrylic block I misted with water, I scooped some PP on my brush and added it to the water directly on the block.  I misted more water as needed to make it more of a wash and painted it over my queen.  I also should mention I used the same PP in a spray mix to spray the background before I started my tag, as well.  I used the Swirls embossing folder, inked with Tattered Rose distress ink, for the background of the tag before assembling it together.


Weathered Wood & Aged Mahogany distress inks were used on the queen, but after going over it with the Perfect Pearls it gave it a sort of Platinum look.  I also used Blush Perfect Pearls over Tattered Rose for the heart -- framing it with Forever Red & more Sunflower Sparkle PP.  =) 
For the background of the queen  I squeezed a blob of Barn Door distress stickles directly on the image and moved it around with my finger to fill in the crevices for an additional pop of glitz.  To finish it off, I used Fired Brick distress stain to color white seam binding ribbon and tied it off over the faux dresden.  The photos don't do it justice for all the shimmer it actually has.  =)

The products I used for this tag: 
Dies:  TH Tag & Bookplates, TH Tattered Banner  (thx Marjie), TH Heart Wings
Embossing Folders:  TH Swirls Texture Fade, TH Poker Face Texture Trades
Distress Inks:  Tattered Rose, Aged Mahogany, Weathered Wood
Distress Stains:  Weathered Wood, Fired Brick
Distress Stickles:  Barn Door
Perfect Pearls:  Sunflower Sparkle, Forever Red, Blush
"For My Friend" - Michael's $1 bin stamps
Hug Snug Seam Binding - White

Thanks for stopping by! Lisa

Tuesday, February 14, 2012

My Son's Origami Rose

Happy Valentines Day!  Our morning started out with heart-shaped Strawberry-Banana Pancakes, Strawberry Syrup, & Strawberry Milk.  Yum!  I met my hubby for lunch, and tonight will be heart-shaped pizzas -- my guys let me get away with it since it's a "romantic" holiday.  LOL

I wanted to share something my son made for his friend...who is a girl.  =)  He made an origami rose!  I am so proud of him.  He knew exactly what he wanted to do and he did it well.  I made the box to hold the rose & we tied it with ribbon for the presentation. 

Cody said he wanted "petal dust" for the rose -- I really didn't know what he meant.  But I did have some Perfect Pearls...so he compromised and used that instead.  He painted Blush Perfect Pearls on the white rose, and shadowed the green stem with Forever Green Perfect Pearls.  For the final burst of shimmer he sprayed Glimmer Mist "Pearl" over the entire rose.  It looked amazing!


 Not sure if you're able to see the shimmer on the photo, but it really looked great.  I made the box using 12 x 24" cardstock cut down to size, and used my Crafter's Companion Ultimate Box Shaper to make the box. 
 The rose was nestled in green tissue paper and fit perfectly.  I forgot to take a picture of the box wrapped with the bow, but we used a shimmered pink & silver ribbon to tie it up.  He left for school with the box, and a feeling of accomplishment.  I love that he decided to make this gift.  Can you tell?  ;-)  By the way, if you're wanting to make this rose, you can find directions for it on YouTube.


My guys each gave me red rose (3) w/balloon & bear, and we'll be having a lovely night together.  Can't forget the strawberry jello jiggler hearts -- add a dollop of cream and we'll call it a day!

I hope your day has been lovely too!  Lisa

A few more Cal Cards


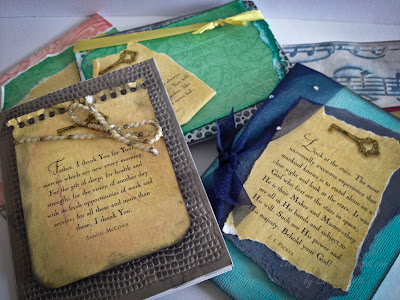
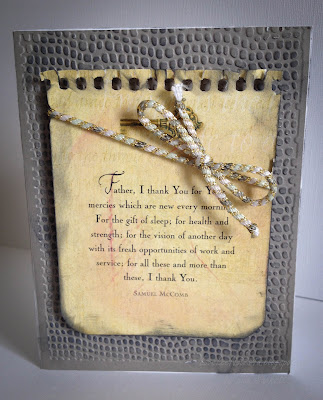
I've been using more calendar pages to make cards -- "Cal Cards".  It's a great way to recycle, and they made great card sets for gift giving.  My last post repurposed a "Finish" dishwasher detergent box for the card box, and these are some of the cards I made to go inside -- using some leftover calendar pages with the date cut off.


Thanks for stopping by.  I've got a Valentine post going up a bit later this evening.  =)  Hope you're having a great Valentine's Day!  

Lisa

Thursday, February 9, 2012

Finish-ed Card Box

I'm finally posting my "Finish-ed" Card Box.  We ended up going out of town last week, and this week our dog, Hercules, has not been feeling well and needed constant supervision -- so time got away from me. 

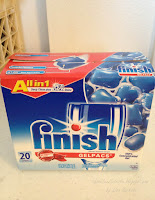
I used an empty box of "Finish" diswasher detergent, cut off the top closure flaps, and made a cover box out of cardstock by tracing around the perimeter of the box. 

Because most commercial boxes have a coated finish on them, I used sand paper to scruff up the coating to give the box some "tooth" so my paint/paper would adhere securely.  I then added a coat of paint for extra durability, before adding deco cardstock -- I used Mariposa by DCWV. 


I adhered cardstock to the inside of the box to give it a finished look, then added cording around the bottom of the box to hide the layer of felt I added to protect surfaces from the roughness on the bottom of the box.

This picture shows the back of the box & the paper adhered to the inside.

I used decorative trim & buttons my Mom had given me years ago to secure the handle & the sides of the cover.  The sides of the actual box can be seen through the cover, as the cover is 6" x 12" cardstock.  I doubled the layers of cardstock for the box cover to give it additional stability, and sandwiched the ribbon between the two layers.  I continued the ribbon on the front of the cover for both a decorative element, and to add continuity.  The buttons were attached with The Ultimate Glue, after I snipped off the shanks. 


You could use this box for all sorts of great gifts, but I found that invitation sized cards (A2) fit perfectly (though the envelopes did have to be folded in half).  So that's what I'm using this one for.  And it's already designated for somebody's birthday.   =)


I'll try to get back this weekend to show these Cal Cards a bit more closely.  Isn't it a wonder some times what you can do to repurpose something that was originally meant for the trash bin?!  =) 

Thanks for stopping by today --
Lisa