Sunday, July 29, 2012

Paradise Found

On a hot July summer day...such as today...I can just imagine the mist coming off of the waves, while relaxing in a hammock at the beach, and sipping on a tall refreshing lemonade!  It's been incredibly hot this summer with little to no rain to speak of (at least in my neck of the woods), so I was inspired to create this tag (and card) for Tim Holtz' 12 Tags of 2012 -- for July.

This month's challenge was all about using alcohol inks in a unique way -- check out Tim's amazing tag for July and his step-by-step instructions HERE

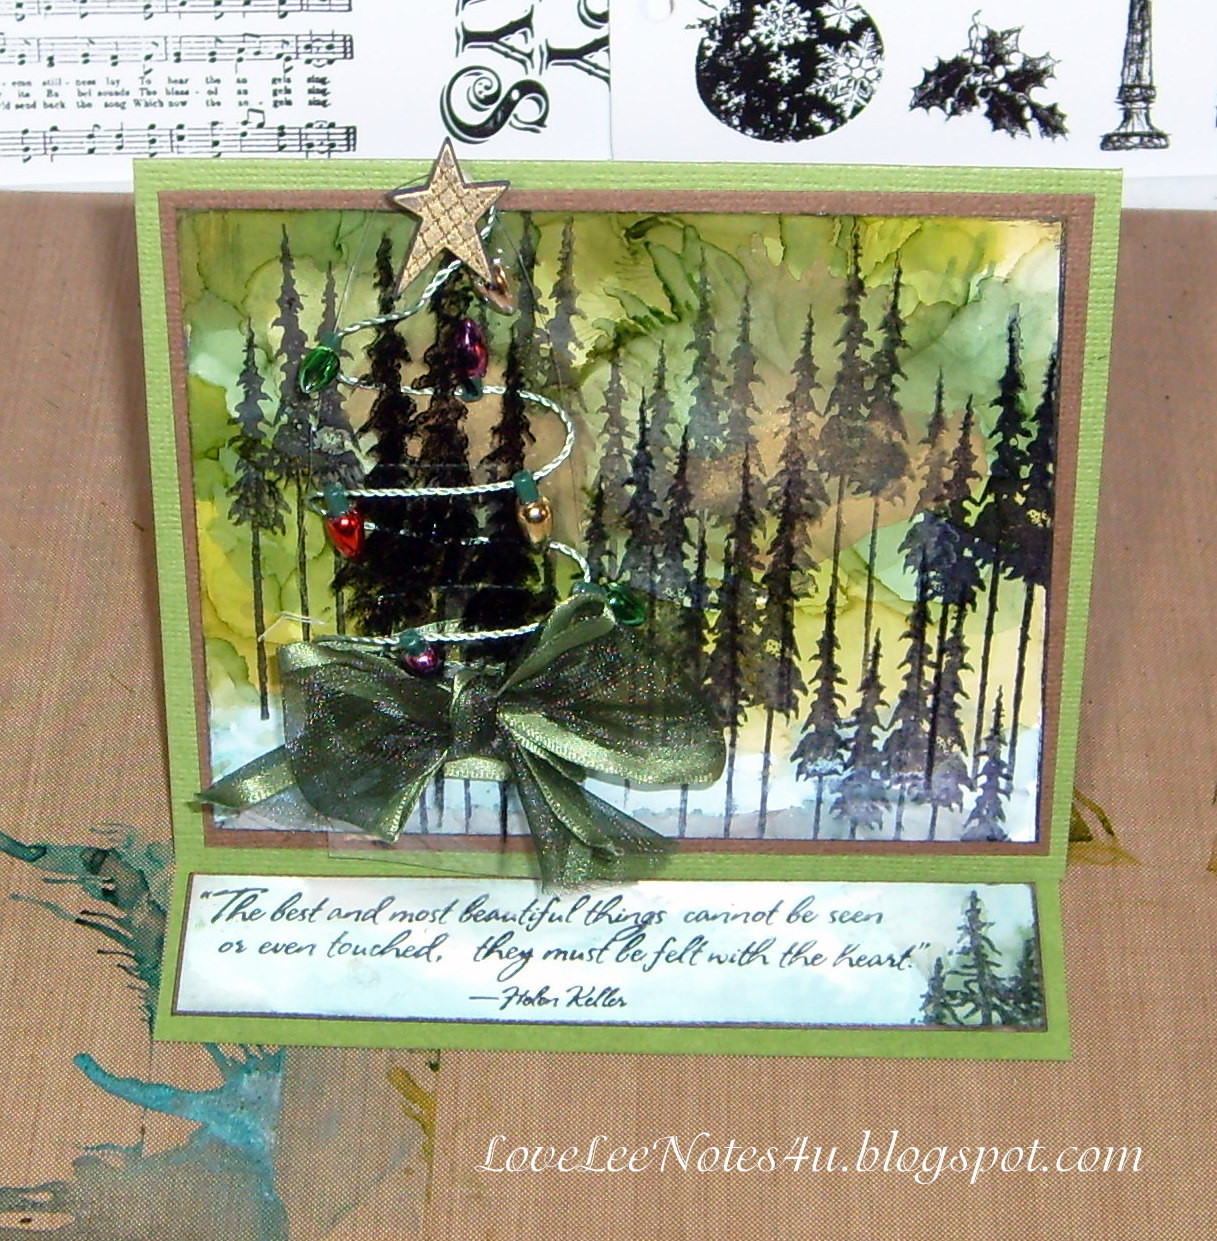
A variety of alcohol inks were used.  For the sand: caramel & latte; for the grassy bits: lettuce; for the sun & sunspots: butterscotch, & gold mixative (on the tag); for the waves: cloudy blue, & stream (on the card).  The pants/sandals were colored with cranberry, using an Adirondack fillable pen.

The white seam binding ribbon for the tag was colored with vintage photo & broken china Distress Stains.  The colors initially go on quite intense but as they blend with water, and dry, the colors lighten up quite a bit.

The stamp set is Paradise (of course), by CTMH.  And I think this just might be the first time I've used it.  But I love it!

You can see another tag I made using this same technique ---> HERE.  It's one of my popular posts found on my sidebar...and is themed more towards winter.

Here's a TIP for cleaning up when using alcohol inks.  First of all, use a craft sheet to protect your work surface.  Nothing sticks to it, and it cleans up beautifully with....Hand Sanitizer!  The hand sanitizer not only helps clean your hands, but add a little squirt to a wet wipe or towel and simply wipe off your craft mat!  Love this stuff!! 

And that's not all -- do you have one of those table that are made out of that hard durable plastic?  If you do, and you like to use dye inks, sprays, and watercolors, you just might find that your table is holding on to some of that color.  Simply add several squirts of hand sanitizer directly to the table and use a damp rag, or wet wipe to move it around and wipe up the mess.  My table still looks like new!  I use this method when I'm teaching classes as well -- a quick & easy way to clean up a lot of mess.

Well, that's it for today! Thanks for taking the time to stop by. 
Stay Cool!  Lisa

Sunday, July 22, 2012

Time to Stretch My Stamps

The past two weeks I've been taking an online class, "Stretch Your Stamps".  I love waking up every morning to new class content with includes PDFs & videos...and lots of inspiration.  This class is just finishing up, so the interactive portion of the class won't be available much longer -- but you can join in on the class anytime as an independent student and watch the videos, download the PDFs, read the forums, and look through the gallery whenever you choose to take the class.  Find out more about it HERE.  I took another of these classes, Creative Chemistry 101, earlier this year, and I think the classes are top notch!

The cards I was inspired to make for this class are shown below.  The stamps used for the cards are listed directly below the cards.

Using Background Stamps ...
Tim Holtz Wallpaper Stamp, Fiskars Fuse die cut,
and Anna Griffin/All Night Media sentiment stamp

Using Collage Stamps ...
Correspondence Collage by Hampton Art Stamps
Festive Alphabet by CTMH

Using Alphabet Stamps (notecards 2 ways, masked/unmasked) ...
Precious Alphabet by CTMH
Flower stamps by Melissa Frances
Using Sentiment Stamps ...
Life in Pictures by Ali Edwards (Technique Tuesday)
Poetry Nostalgiques by EK Success, The Attic Collection (Rebecca Sower designs

The greeting is on back of the "Happy Anniversary" frame,
which clips to the front of the card.

Using Floral Stamps ...
Calla Lily, PSX 2001
Greetings Script by CTMH

Using Label Stamps ...
Annotations by CTMH
Doodle Alphabet by CTMH

Using Outline Stamps ...

Doodles & Nature, by Claudine Hellmuth
(can you see the clear embossed raindrops & Perfect Pearls sun?)

Using Border Stamps ...
Stitched Ribbon, & Double Scalloped Ribbon by Hero Arts

Quote - anon.

Using Reverse Stamps ...
Tree I, II, III, & IV by Hero Arts
Inside sentiment:  To everything there is a season, and a time to every purpose
under heaven.  Ecclesiates 3:1                 

The only cards I didn't get a chance to make were using graphic stamps & stamps w/coordinating dies.  I enjoyed this class immensely, and can't wait to take another one.  I always learn something new, and the creative inspiration of the instructors & guests....not to mention the huge galleries, are amazing.  A huge thank you goes out to Jennifer McGuire & Kristina Werner, and all the guest designers, for this wonderful class (click on their names to visit their awesome blogs)!

Have a Lovely Day!  Lisa

Tuesday, July 10, 2012

Art Journaling From Partial Pages

I thought I'd share some Art Journal (AJ) pages I've been working on, showing them from the partial page to the completed page.  When I teach AJ classes I often use my own books as a "stomping" ground to show how a particular color looks, show a technique, or do a quick play-by-play.  What this means is that I come home with several pages of miscellaneous chaos.  However, I make sure my students see what I'm leaving with, and when I bring it back to the next month's class...it's transformed in some way for the start of another AJ page, or even ... dare I say, completed!

I think it's a rather good way of showing that you can still make something out of, what seems to be, imperfections.  One of the things I love about teaching is that I can show an entire class the same technique, using the same stamps, etc., and not one of the Art Journals will look the same, yet they all have their own style of creative loveliness -- how much fun is that?!! 

Here are a few of my page progressions...completed pages (at least for now), directly beneath the partials I began with.
Partial - showing Dylusion sprays on a dry page (color intensity/saturation)

Painted hearts w/black marker, white Signo pen, & Archival black inked stamps
Background resembles the look of tie-dye

I really liked the look of the tie-dye background, and could've gone in many directions...but I like the simplicity of the page layout, at this stage.  

Playing with stencils, sprays, & ink (positive/negative imaging)
You can see the "tie-dye" page coming through on the right side.

A little Tim Holtz tissue collage, magazine cut-out, & black marker.
The stencils recede into the background with the boldness of the journaling and outline of the collage.


Partial - working with color: sprays, inks, & gesso

Background & Corner stamps, and black marker

Adding a gesso layout between the two pages helped bring the two colors together, as a temporary fix.  Adding the stamps & journaling makes it into a simple readable page layout. 


Partial - stencils, stamps, inks, gesso...randomness

Paint, gesso, Archival ink, distress ink, marker, stencils & stamps
Reverse imaging using the Claudine Hellmuth Nature bird stamp.

Many times I'll grab a random stamp for a technique -- the challenge later is finding a way to make it work into an AJ page.  If nothing else comes to mind, gesso covers a multitude of mishaps...but what fun is that?!

Think about all the possibilities for your other projects, scrapbook layouts, & cards -- you might even surprise yourself, what you can come up with. 

Have an Artful day!  Lisa

'Never say, "oops". Always say, "Ah, interesting"!'   ~ anon.